
What is TallyPrime?
For small and medium-sized businesses, TallyPrime is a comprehensive business management application. This Software will assist you in managing accounting, inventory, banking, taxation, finance, payroll, and many other tasks so that you may eliminate complications and concentrate on business expansion.
Also Read :- Our List of Top Accounting Software/Tools for 2023
TallyPrime Software was released in the year 2020. Tally Solutions unveiled Tally Prime, a brand-new product with a Tally-like feel, with the intention of pleasing customers and providing a cutting-edge solution that will surely change how businesses operate thanks to its enhanced flexibility and efficiency. Tally Prime now makes it possible for small and large businesses, as well as their owners, Chartered accountants, Accountants, and other Tally Users, to manage their jobs more effectively and make every day simpler.
Some Important Features of TallyPrime in compare to Tally ERP9 :
- Simpler User Interface
- Taxation / GST
- Business Reports With Insight
- Invoicing and Accounting
- Management of Cash Flow
- Management of Inventory
- Payroll management
- Capabilities for multitasking
This Topic will cover how to download, Install and Activate the Tally Prime and start using the products to record your 1st Transaction.
You need to establish a business before using the software. Following that, you may begin recording your transactions. You may also create a ledger to record all of your transactions and manage your finances. With its Educational Edition, this product gives you the option to try it out before you buy it, which is advantageous for students.
Download & Install Tally Prime
Your initial step should be to visit Tally Solutions‘ official website in order to get this application. The next step is to download TallyPrime software from the products section. You may start the installation on your computer as soon as all the necessary files have been downloaded.
Your computer must have a 64-bit edition of Microsoft Windows 7 or later, 4 GB of RAM, and 150 MB of hard drive space (only for installation purposes; more storage is needed to store corporate data) in order to run the software.
1. Download the Required Files.
- Open Link https://tallysolutions.com/download/ in your Browser.
- Click on Download.
The setup.exe file will be downloaded in the Downloads folder; you can move it to any of your desired folders.
2. Install TallyPrime.
- Double-Click on Setup.exe.
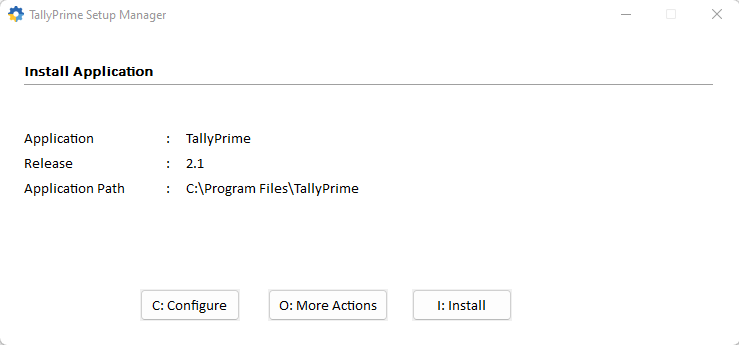
- Configure the Application Path if required.
- The application path will be set by default at C:\Program Files\TallyPrime
- Click C: Configure
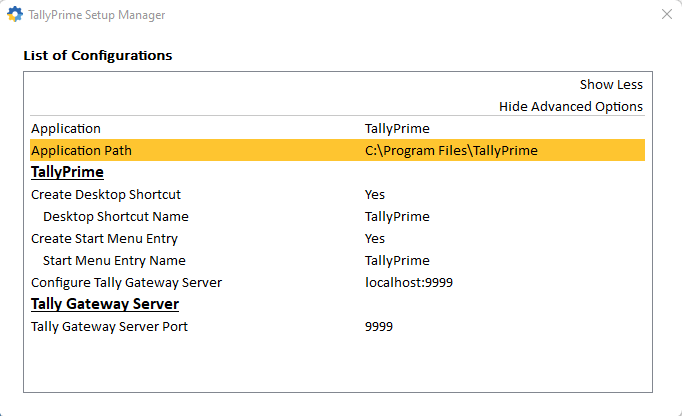
- Double-click on Application Path to change the default location.

- Select a new path by clicking on the … icon.
- When a new path is selected close the list of configurations window.
- Click on I: Install to begin Installation.
Once the software is installed successfully, the below window will open.
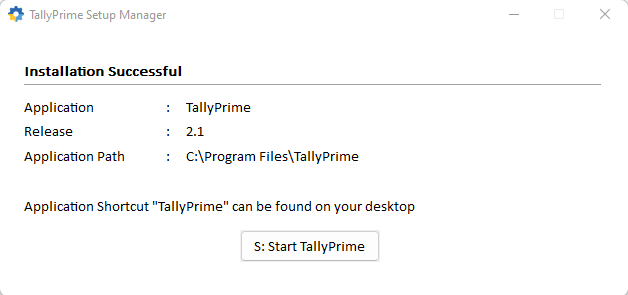
- To Launch Tally Prime Click on S: Start TallyPrime.
Activate TallyPrime License
1. Once the Installation Completed you can launch Application from clicking on S: Start TallyPrime.
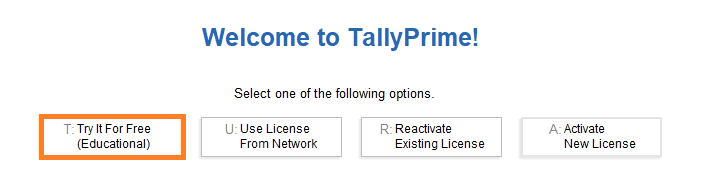
2. You will see a screen which indicates Welcome to TallyPrime! Massage.
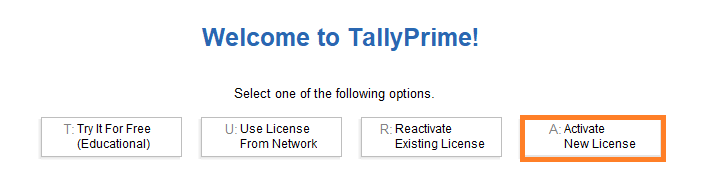
3. You will see 4 different options, but for now you have to select Last option A:Activate New License.
4. Next you will get below screen which titles Activate License.
5. You have to enter mentioned details in the respected fields like Serial Number, Activation Key, and Administrator Email-ID.
6. Once you enter all required details press Enter to proceed further.
7. Next Unlock License screen appears. Here you have to enter the unlock key which was sent to you at your Email-ID.

8. Press Enter once you fill the required Unlock Key.
Once your License Unlocked, you will receive the Below Screen which tells you License is Successfully Activated.

Once you finish all the above mentioned steps, Congratulations you have completely installed and activated your TallyPrime Software on your system. By establishing your first company, you may now utilize that programme for your commercial transactions.
How to launch TallyPrime in the educational version
I have earlier mentioned that TallyPrime will give you a free trial as Education Version of it and here i will explain how you can access it.
You can refer above mentioned method to Download and Install TallyPrime in your Device, once you completely install the software in your device you will receive Installation Successful Image Screen which shown in above step “2. Install TellyPrime”.
1. Click the S: TallyPrime to Launch the software.
2. Now in earlier steps we have selected option “A: Activate License’” instead of that now select option “T: Try it for Free(Educational)”.
3. You will discover that the window title is in dark green color and shows EDU under the product name.
4. Done, You have successfully Enabled the TellyPrime Educational Version.
Conclusion
In comparison to Tally ERP 9, Tally Prime is a better and more advanced version. It contains a number of extra features that all Tally users will find time-saving and very helpful. We hope this post has provided you with all the required information on Tally Prime, including the Download, Installation and Activation.